
The “Windows can’t connect to this network” error is a typical network issue that Windows 11 users confront. This error may be quite aggravating because Windows needs instructions on how to fix it. In some cases, you may only need to run the network troubleshooter or update the network driver. However, the solution may be a little more complicated but don’t worry. We’ll lead you through a thorough troubleshooting procedure to resolve the “Windows can’t connect to this network” error.
How To Fix Quickly “Windows Can’t Connect To This Network” Error In Windows 11?
Connect To The Network Using Another Device
There’s a chance your Windows 11 computer is fine, but you’re seeing the “Windows can’t connect to this network” error because of a network issue. To test it, attempt to connect to the same network with a different device. If you run across the same error, you must resolve network issues. Well, if you can connect to the same network on a different device, follow the troubleshooting instructions below.
Manage Network Drivers On Windows 11
In many circumstances, connection issues such as the “Windows can’t connect to this network” error can be remedied by upgrading your PC’s network drivers. But, if you recently upgraded the drivers and the error came soon afterward, you should roll back the drivers to the prior version until the new ones are fixed. Then, try reinstalling the drivers to see if it fixes the problem. All these activities can be accomplished simply by entering the Device Manager, so let’s dig in and attempt some fixes.
Update Network Drivers
Do the following to update your network drivers.
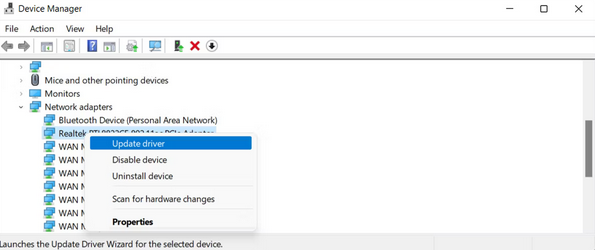
1 – Right-click the Start button, and choose Device Manager.
2 – In the Device Manager window, select the Network adapters section.
3 – Right-click the wireless adapter for the device and then click Update driver.
4 – Select Search automatically for drivers in the subsequent window.
5 – Windows will download and install the most recent driver for your device.
Roll Back Network Drivers
Here’s how to revert to the previous network drivers if the issue began after you installed a new one.
1 – Launch Device Manager.
2 – Select the Network adapters section.
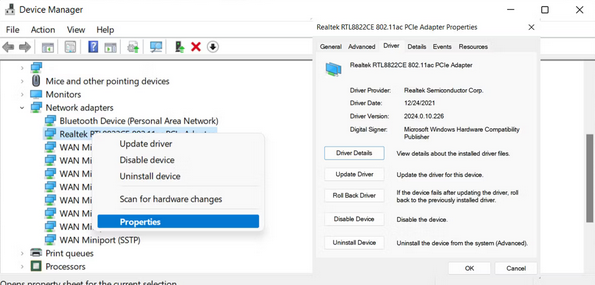
3 – Right-click the network driver and choose Properties.
4 – Choose the Driver tab from the Properties box.
5 – Click the Roll back driver option. If the driver still needs to be updated recently, the option will be grayed off.
6 – Windows will install the previous network driver version.
7 – Reboot the computer.
Uninstall Network Drivers
Download and install your network drivers from the manufacturer’s website if you wish to start over. It’s a good idea to do this before uninstalling your existing network drivers; if you don’t, you can connect to the internet using that network adapter once you reinstall its drivers. It’s time to remove the old one once your new drivers are ready.
1 – Launch Device Manager.
2 – Expand the Network Adapters section once more.
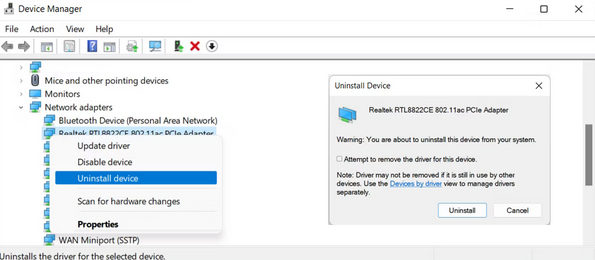
3 – Right-click the network driver.
4 – Choose Uninstall device.
5 – Select the Attempt to remove the driver for this device option.
6 – Select Uninstall.
7 – When you reboot your computer, Windows will reinstall the driver.
Check Windows Updates
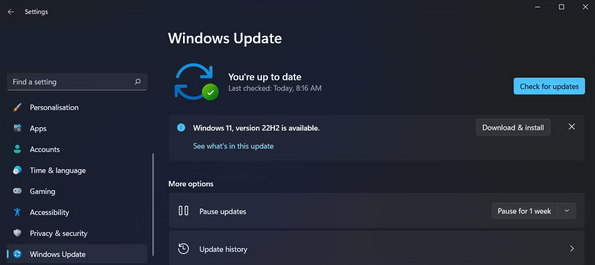
Microsoft provides updates regularly to fix any bugs and glitches you may encounter while using your computer. However, if you’re running an older version of Windows, you can lose out on updates that make your computer run more smoothly. Press the Windows key + I to launch the Settings menu and update Windows to the most recent version. Next, click Windows Updates > Check for updates. Windows will look for and install any available updates. Try to connect to the network once the process is finished.
Disable IPv6
Unless specifically requested by your router or ISP, IPv6 is not required for most connections. As a result, you should disable it and attempt reconnecting to the wireless network. Here’s how to disable IPv6 on your computer.
1 – In the System Tray, look for the network icon.
2 – Select Network and Internet settings by right-clicking on the icon.
3 – Click Advanced network settings.
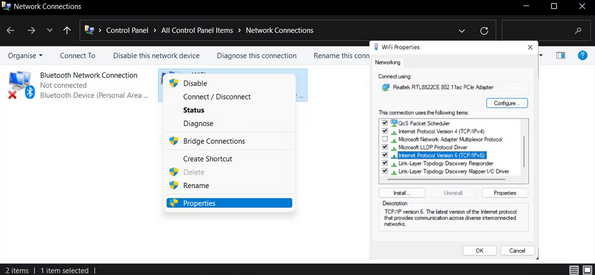
4 – Choose More network adapter options from the Related settings menu.
5 – Right-click the wireless network and choose Properties. Verify that you have administrative privileges.
6 – The Internet Protocol Version 6 (IPv6) option should be unchecked.
7 – Click OK.
8 – Reconnect to the wireless network once more.
Disable & Enable Wireless Network Adapter
In some Windows operating systems, a simple reset of the wireless network adapter will fix connection time issues. With Windows 11’s Advanced network options, you may accomplish this.
1 – Choose the Network icon in the System Tray by right-clicking it.
2 – Click Network and Internet settings.
3 – Click Advanced network settings.
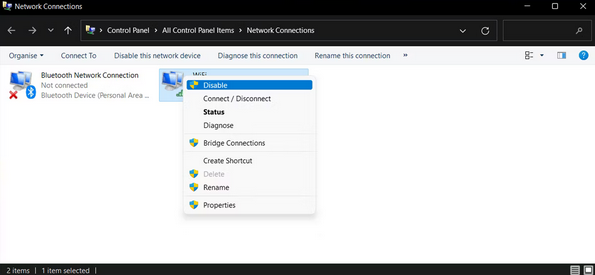
4 – Choose More network adapter options in the following box.
5 – Right-click the wireless adapter and then click Disable.
6 – After a brief time, right-click the wireless adapter and select Enable.
7 – Reboot the PC and try reconnecting to the network.
Release IP And Flush DNS Cashe In Command Prompt
An IP error might cause the “Windows can’t connect to this network” error. You must release the IP address and cleanse the DNS cache to fix this. This may sound difficult, but you have to run a few commands at the Windows Command Prompt, and Windows will take care of the rest. Here’s how to accomplish it.

1 – In Windows Search, type cmd.
2 – Run as administrator by right-clicking Command Prompt.
3 – On the Command Prompt, enter the following commands and click Enter after each one.
- netsh winsock reset
- netsh int ip reset
- ipconfig /release
- ipconfig /renew
- ipconfig /flushdns
4 – Exit the Command Prompt and reboot the computer to check whether the error persists.
Reset Windows’ Network Configuration
An incorrect network configuration is one of the most prevalent causes of the error “Windows cannot connect to this network.” A simple solution to fix this is to restore your PC’s factory default network settings. Thankfully, Windows lets you reset all network settings with a single option.
1 – Choose Settings by right-clicking the Start button.
2 – Click the Network & Internet option on the left navigation bar.
3 – Select Advanced network settings in the following box.
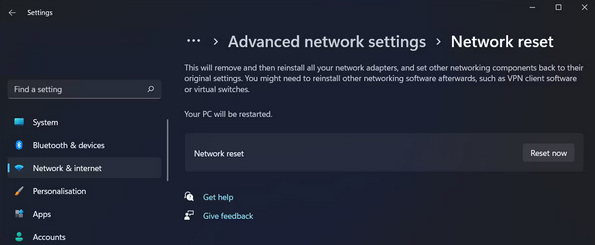
4 – Click Network reset under More settings.
5 – Click Reset now.
6 – Your PC will reboot.
Turn Airplane Mode On And Off
This fast technique may be sufficient to solve your network issues. By turning on Airplane mode, you advise Windows to disengage from all networks. If you disable Airplane mode, you may re-establish a solid connection. Click the Airplane mode tile in the Windows Action Center window. Please turn it off after waiting a few minutes. Then attempt to reconnect to your network again. There are additional ways to enable and disable Airplane Mode if it is not available in Action Center.
Use Network Troubleshooter
To detect and fix network issues, Windows 11 has a built-in troubleshooter. So to check if the program can detect and fix the issue causing the “Windows can’t connect to this network” error, it’s worth a go.
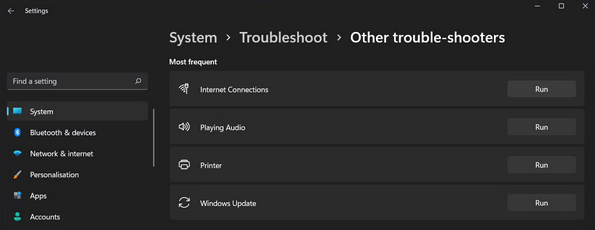
1 – Type network troubleshooter into Windows Search.
2 – Click the Find and fix network problems option from the search results.
3 – In the troubleshooter, click Next.
4 – Windows will detect and try to fix the connection issues on your computer.
Forget & Reconnect Wi-Fi Network
When attempting to connect to specific networks, Windows should forget them if you receive a network connectivity error.
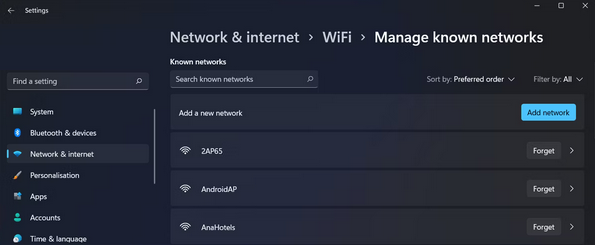
Here’s how to control every network you’ve connected to.
1 – Launch Windows Settings.
2 – Navigate to Network & internet > Wi-Fi.
3 – Choose Manage known networks.
4 – Click the Forget button next to the network you can’t connect to.
5 – Reconnect to the Wi-Fi now. It would be best if you re-entered the password.
Restart Or Reset The Router
Occasionally your router gets stuck and has to reboot to work again. As a result, resetting your router is a quick and easy solution to fix an unreliable Wi-Fi connection. Depending on the kind of router you own, there are many methods for resetting it. Nevertheless, there is typically a physical power button on the router itself that you may use to turn it off and on again. If not, open the router’s setup page and reboot it. If that fails, you may restore the router to factory defaults using a button on the router or the configuration page. But, after resetting the router, you must reconfigure it.
Use Ethernet Cable
If you’ve tried everything on the list and need more time to go through more time-consuming methods like installing a large Windows update or loading a restore point, there’s one easy fix. Use an Ethernet wire to connect to the network. It will fix the issue, and Ethernet connections will be more dependable and provide faster rates.
Conclusion:
Well, the “Windows can’t connect to this network” error on the computer will likely be resolved by one of these fixes. However, considering how many Windows network issues may arise, it’s a good idea to grasp the basics of troubleshooting them so you can get stuck with the internet in the future. When you fix the connectivity issue, consider raising the internet speed in Windows 11.