
DNS, or Domain Name Server, is a critical component of the internet infrastructure that converts human-readable domain names (for example, www.example.com) into machine-readable IP addresses (for example, 192.0.2.1). DNS is required for internet traffic to be routed to the right destination, and most internet-based services, including email and file sharing, rely on DNS in some form. Your Internet Service Provider will typically provide a default DNS for your network. However, you can use a custom or third-party DNS for quicker and more dependable service. On Ubuntu, you may change the DNS server via network settings or by editing a configuration file using the command line.
How To Change DNS Server On Ubuntu?
Change DNS Through GUI Network Settings
Log in as an administrator on Ubuntu and follow these instructions to change the network settings.
1 – Open the Settings app from the app drawer. Then, click the Network tab at the top of the left sidebar.
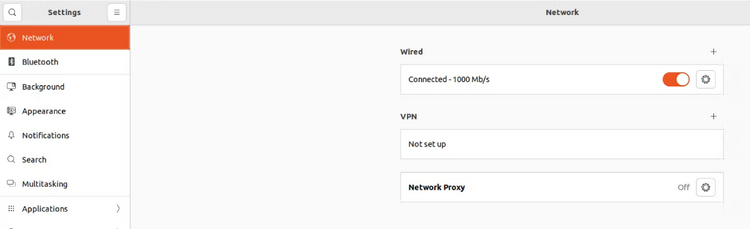
2 – You will notice your Wired and Wireless network connections in the network settings. To open a popup menu with numerous tabs, click the Cog symbol.
3 – Next, navigate to the IPv4 tab and make sure the IPv4 Method is set to Automatic (DHCP). The DNS setting is located just below that. Toggle the Automatic button to the right of it off.
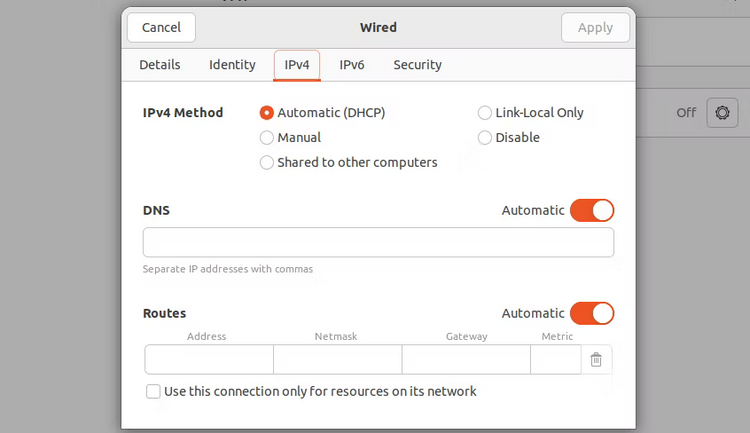
4 – Enter the new DNS server IP addresses, separated by commas, in the space and click Apply. As it is crucial to your network and privacy, ensure the IP address is proper and secure.
Using Command Line
If you’re using Linux, you’re probably used to working through the terminal. So, here’s how to change the DNS settings on Ubuntu using the command line. Run the terminal window.
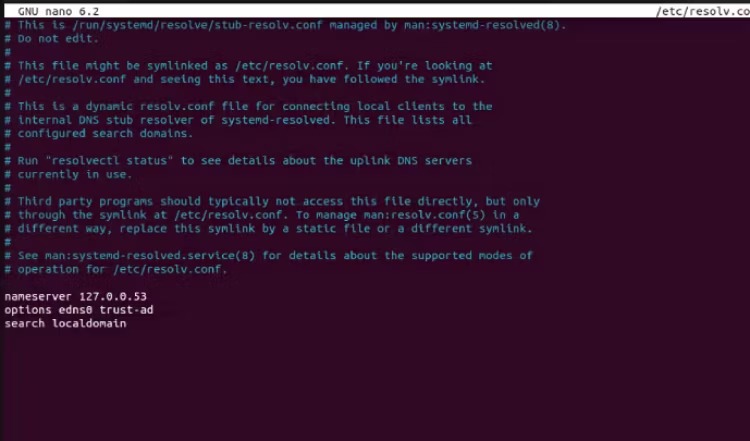
sudo nano /etc/resolv.confThis opens a file with the current DNS server settings.
Replace the current nameserver IP address with the new DNS server IP address. So you be secure, make sure you use a reputable DNS server.
To save the changes, press Ctrl + O and Enter. Then, to quit nano, hit Ctrl + X.
Run to restart the networking service.
sudo systemctl restart NetworkManagerYou have now successfully changed the DNS settings on Ubuntu using the command line.
Conclusion:
Changing DNS on Ubuntu is a straightforward operation that may be accomplished by editing the configuration file in the terminal or using the GUI network settings. Using custom or third-party DNS servers may enhance the performance and reliability of Ubuntu’s internet-based services. However, it is also advised to use caution while changing DNS servers since doing so wrong might harm your internet connection. Changing your DNS in Linux, on the other hand, might improve your whole internet experience.