Even though TikTok’s video editing tools are not the most sophisticated, they are sufficient for preparing a video for uploading while on the move if just simple tweaks, such as adjusting the length or adding overlays or effects, are required. The option to trim the length of videos is a function of TikTok that is essential to the default editing suite. Let’s look at how “trim” works and how it’s done on TikTok.
Trim Videos On TikTok: What To Know
TikTok video trim is useful for cutting a portion of a video from its beginning or end. If the video being prepped has more than one component or clip, the app also allows you to trim each clip separately to reach the desired smoothness or as near to it as feasible, given the feature’s limitations. The disadvantage of TikTok video trim is its primitiveness; it only qualifies as a rudimentary snipping tool for trimming video tail ends and only supports one trim inside a single clip.
Despite its simplicity, it has proven to be a useful tool for easily adjusting the frame or length of a video to cut out undesired video content or even attune it to the background soundtrack. Before discussing how to make the most of the trim option on the app, let’s look at how it is done.
How To Easily Trim A Video Recorded On TikTok App?
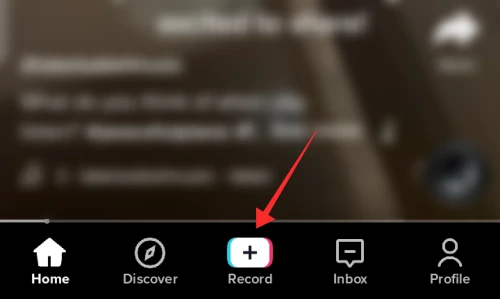
1 – To access the app camera, launch the TikTok app and tap the Record icon.
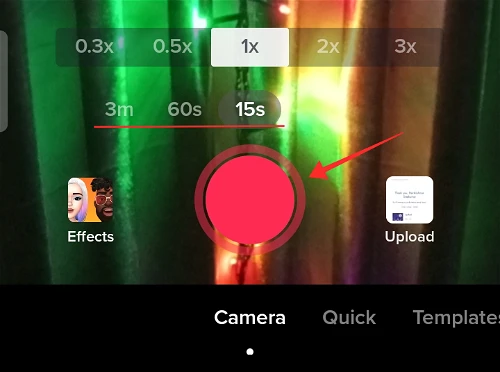
2 – Hit the red circle to begin recording after setting the time duration.
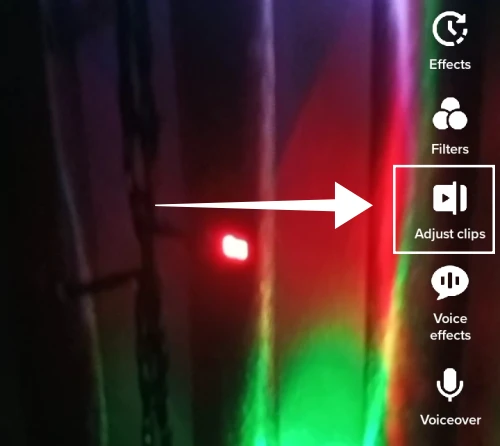
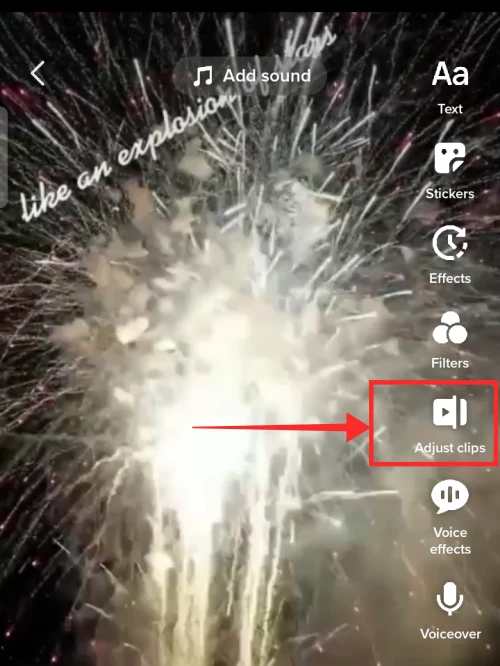
3 – Tap Adjust clips in the editing tools on the right side of the screen.
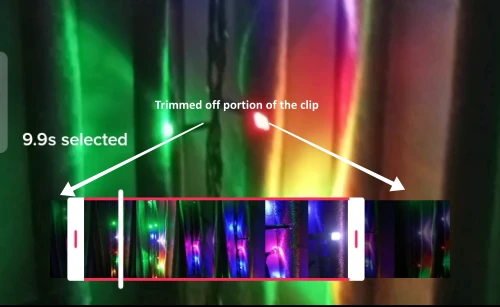
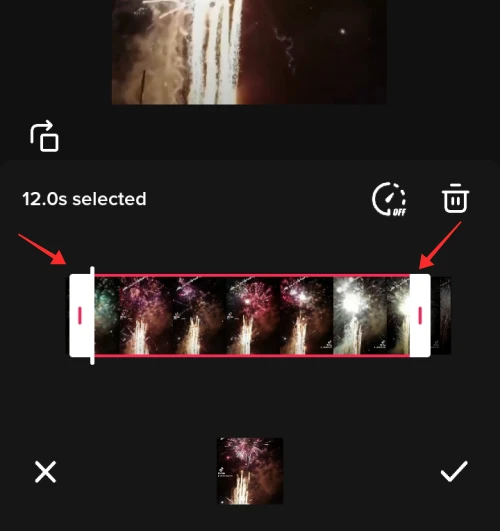
4 – The video trimming tool is made available. To adjust the length or duration of the recorded video, drag the white blocks at the beginning or end of the seek bar.
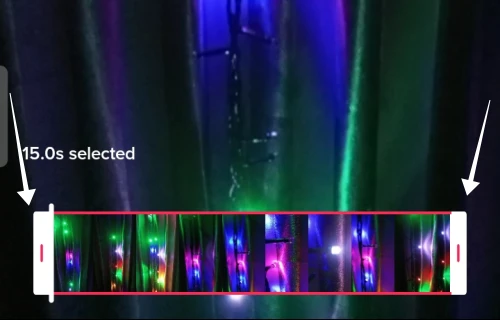
5 – The screenshot below shows how the tool works. As the specified length, the (new) length (time duration) of the trimmed video replaces the original length on top of the seek bar.
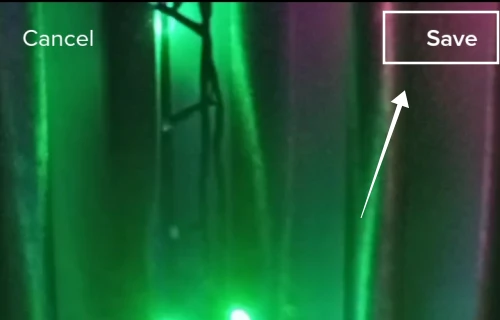
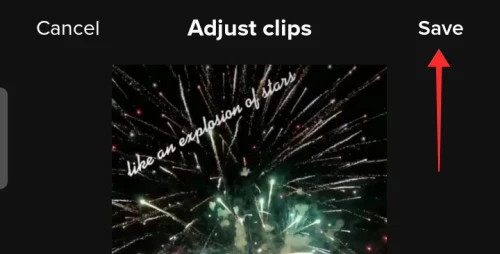
6 – Once the video has been clipped to the desired length or point, tap Save.
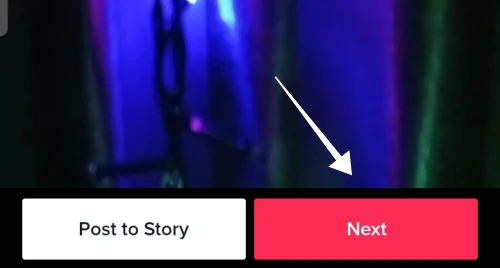
7 – Make more changes to the clipped video you like, such as adding music or effects, and then hit Next.
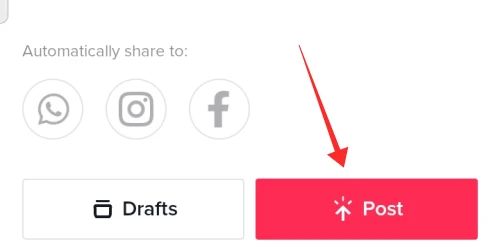
8 – Check the privacy settings and add context and hashtags to the video. Then, upload the video by tapping Post.
9 – Only the beginning or end portion of a video taken using the app can be adjusted for length. If you want to split or trim the video in the middle or do numerous trims, you’ll need to use one of the many third-party editing apps, such as InShot or YouCut. You may use the trimming tool to trim each video independently if your video has numerous clips.
10 – Tap Adjust clips in the vertical list on the right side of the screen once the video has been recorded.
11 – Each clip shows as a separate slide beneath the seek bar. To trim the beginning or end of the recorded video, you may use the seek bar or tap and select any clip on the slide.
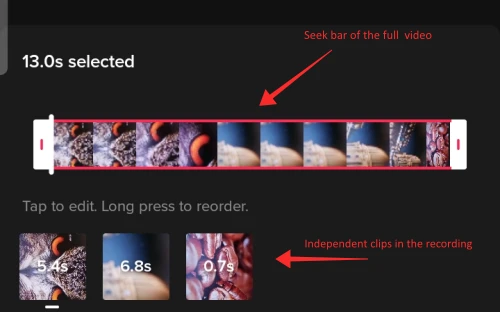
12 – When each clip is selected independently, it behaves as a distinct unit and may thus be nipped as an independent unit.

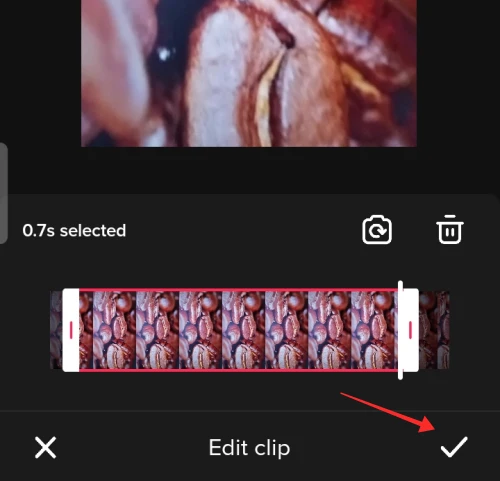
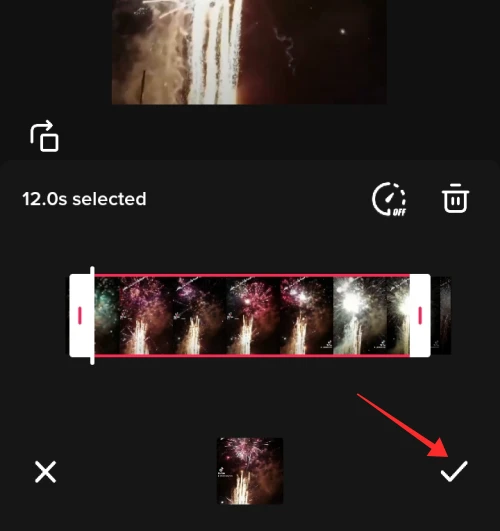
13 – To complete the procedure, tap the check button.
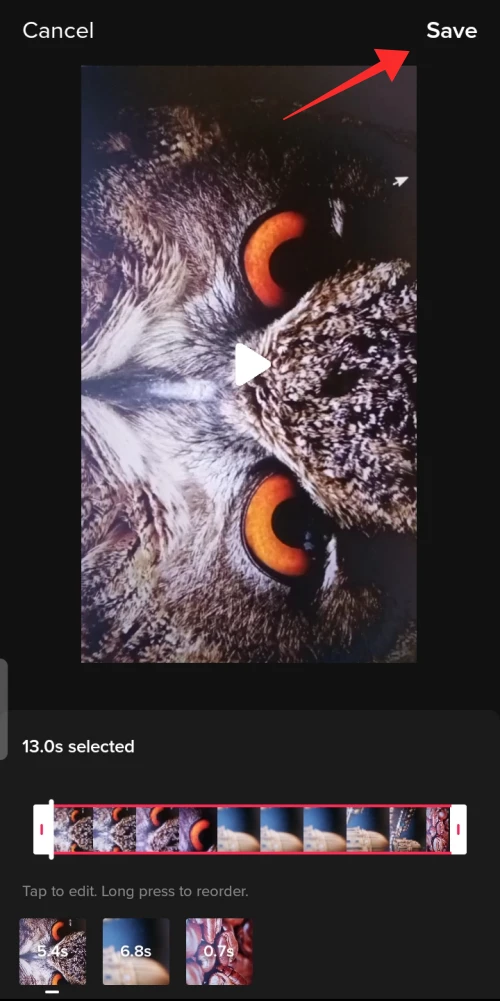
14 – Click Save to return to the main editing page.
As a result, several trims can be applied to newly recorded videos as long as they are captured with a pause to make distinct clips.
How To Easily Trim A Video From Phone Library Using TikTok App?
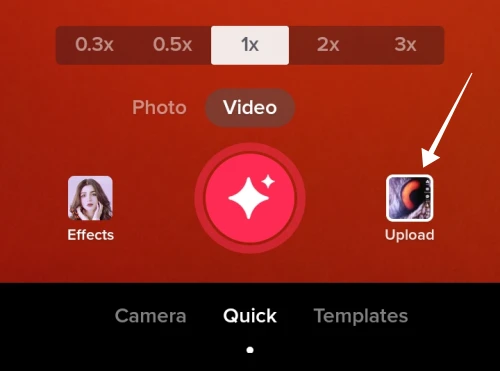
1 – Open the TikTok app, tap the Record button to gain access to the camera and library, and then tap Done.
2 – On the right side of the red record button, tap the Upload box.
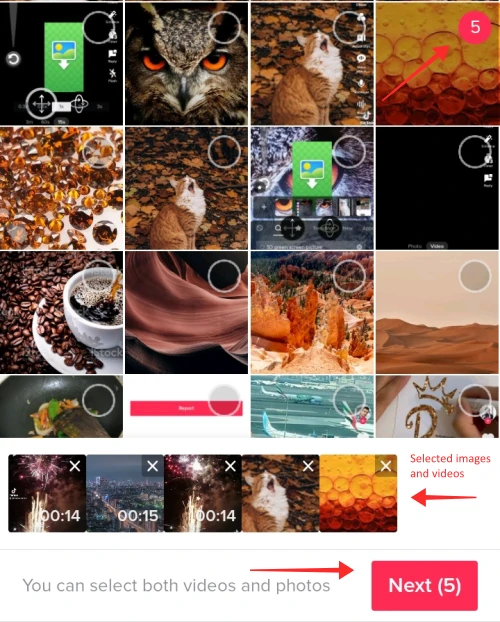
3 – Select photographs and videos from the phone’s library (the choices are lined up for viewing at the bottom of the image grid); hit Next to proceed.
4 – Select Adjust clips from the list of editing tools on the right.
5 – To trim the video’s length into a single continuous clip, drag the white blocks at the beginning or end of the seek bar.
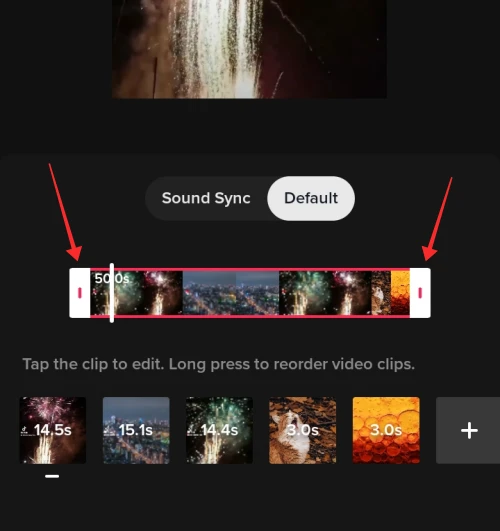
6 – On the other hand, if you want to, you may adjust the duration of each video clip. To select a clip, tap it in the tray below.
7 – To adjust the clip’s length, drag the white blocks at their beginning or end.
8 – When finished, press the Tick button. Following the same steps, you can edit all or any selected clips.
9 – Tap Save to return to the main editing page.
As a result, your video is ready for additional decoration, such as adding filters, text overlays, or audio background.
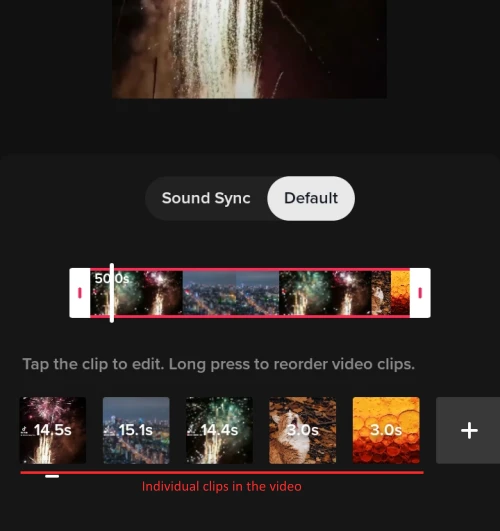
Auto-trim Videos On TikTok Using Sound Sync
TikTok video trim features an attractive auto-trimming tool and manual trimming that you can test. It’s nothing fancy, but it uses automatic snipping depending on the background music sound provided to the video. It cuts the component clips to fit the length of the sound bite by cutting off their beginning or end portions – something we perform manually but which the app does automatically using the Sound Sync function under the Adjust clips tool. Here’s how you may profit from this handy tool as well.
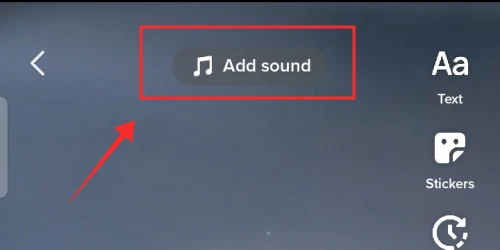
1 – Tap Add sound on the Video Editing page.
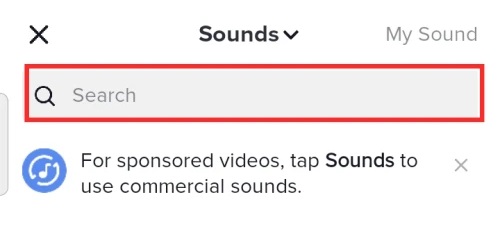
2 – Keeping the length of your video in mind, search for and select a sound from the app library.
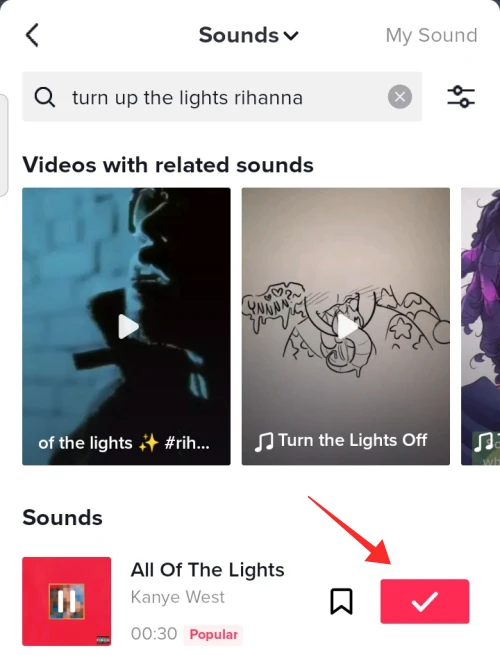
3 – Select a sound bite that compliments your video’s length if it is greater than 15 seconds. For example, the screenshot below shows a sound clip that lasts for 30 seconds. To complete your selection, tap the red tick button.
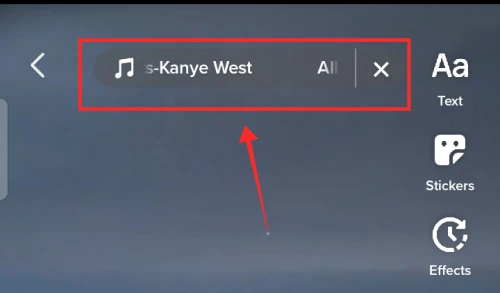
4 – From the options, tap Adjust clips.
5 – Tap Sound Sync. The video clips are automatically trimmed to “sync” or to match the duration of the trimmed sound clip specified as background music.
6 – To apply the changes, tap Save.
Is It Possible To Trim Sound On TikTok?
As you may be aware, in addition to the audio clips you upload as “original” from your end, you also receive a selection of songs from the TikTok library. Therefore, you may still adjust the beginning of the sound even though you won’t be able to trim it as you would a video clip. Adjust the sound obtained from the library in your video editor by following the steps below.
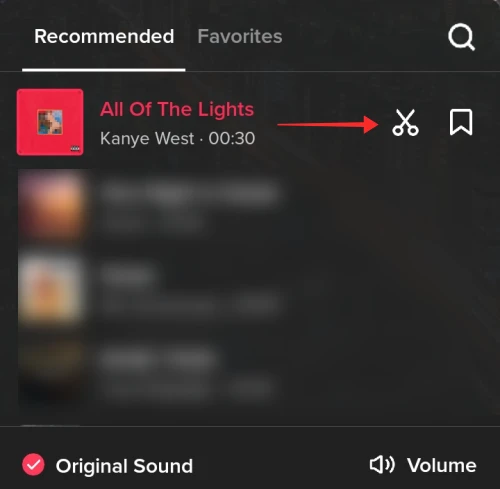
1 – Tap Add Sound from the video editing screen.
2 – Look for a track at least 30 seconds in length in the library.
3 – To complete the selection, click the red check button.
4 – To view the option, tap the track marquee.
5 – Tap the scissor button that is located next to the track.
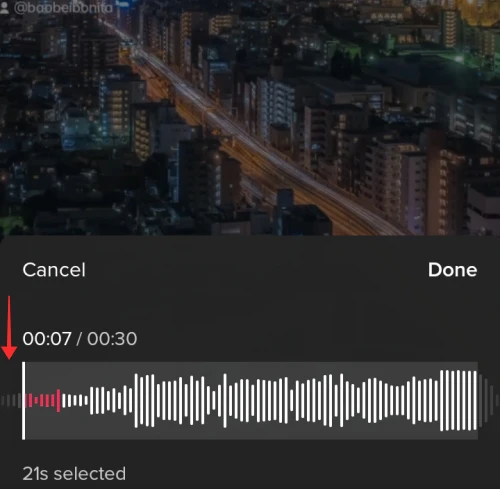
6 – Press and drag the sound wave bar to align the white line with your preferred beginning point.
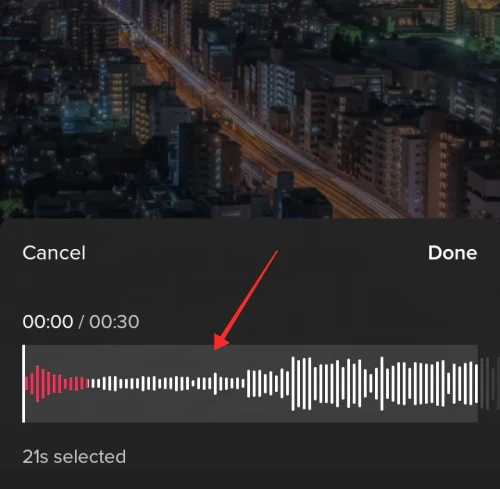
7 – In the selected sound clip, the portion to the left of the white line is omitted from the selection.
8 – Tap Done on step eight.
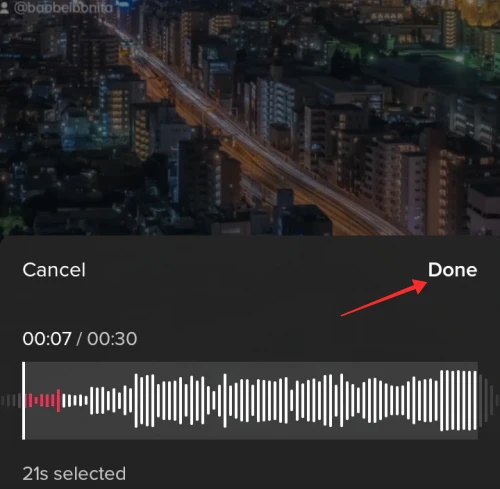
9 – When you tap Done, the beginning of the sound is automatically changed to the new point. You may also use Sound Sync to auto-trim the video clips by following the instructions above the current header.
FAQs:
Is It Possible To Trim Videos After Uploading Them On TikTok?
No, after uploading, a video cannot be edited. That is, while TikTok allows you to change privacy settings such as who can view the video or whether others can interact with your content, the app does not allow you to make any visible changes to the video itself (such as changing the captions, adding or removing effects or filters, trimming, changing audio, and so on). A video is done and cannot be changed after it has been posted. The only way to incorporate the needed changes into the video is to remake it or edit a downloaded version of the original video.
Does TikTok Offer The Auto-trim Feature For Videos?
TikTok does include an auto-trim capability; however, it is a buried element under the Sound Sync tool under Adjust clips. TikTok’s Sound Sync feature automatically snips off all individual video clips to accommodate the dominating sound introduced as the unifying background music. Sound Sync is a rapid trim tool to avoid the time and effort involved in manual video cutting. Auto trimming, however, may result in quality loss because the portions cut off may be critical to the video. It is, therefore, the best tool to edit collages or video slides without bearing on the content.