Do you get the dreaded “Could not connect to the Steam network” error when using Steam? A sluggish internet connection, a defective network adapter, incompatible software, and other factors may be to blame. If you need help determining what’s causing the issue, work through the following fixes to eliminate Steam connection errors.
How To Fix Quickly The Could Not Connect To The Steam Network Error On Windows?
Check Internet Connection
A shaky or irregular internet connection might prevent apps like Steam from connecting to the server, resulting in errors like this. As a result, your first step should be to rule out any internet-related issues. You may run an internet speed test to ensure your computer has a dependable and constant internet connection.
Check If Network Adapter Is Working
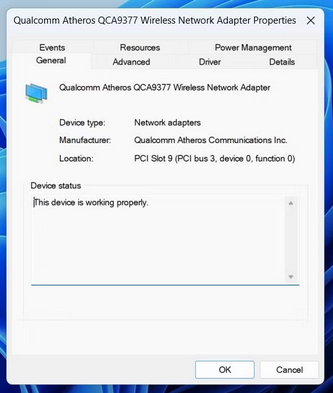
Errors like the one described here might also lead to problems with your PC’s network adapter. If you’re having similar issues with other apps, check if your network adapter works properly. Here are the steps to follow.
- To access the Power User menu, right-click the Start button or press the Win + X keyboard shortcut.
- Choose Device Manager from the drop-down menu.
- Expand Network Adapters and then double-click a network adapter to open its properties.
- Check the Device status under the General tab.
Restart PC
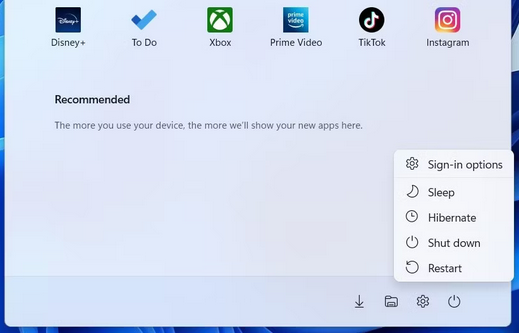
This is another simple repair to attempt before going on to more complex solutions. Restarting your computer will give Windows a fresh start and resolve any small problems causing Steam to misbehave. Open the Start menu, then click the power symbol, and then select Restart from the option that appears. Try using Steam again when your computer has rebooted.
Run Steam As Admin
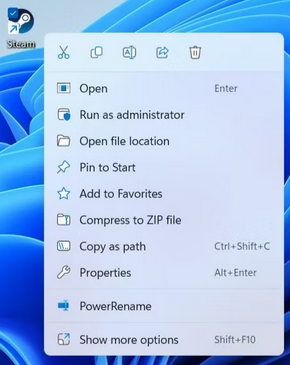
Running Steam with administrative credentials gives it the most access to your PC and allows it to run smoothly without interruptions. Right-click the Steam app shortcut and select Run as administrator. If this resolves your issue, you may set Steam to always run as administrator on Windows.
Check If Steam Is Down
You might not be the only one experiencing issues with Steam. Steam’s servers may be down. To see whether there is a problem, check Steam’s server statistics page. If there is a major outage, you will observe a big dip in the Steam user graph.
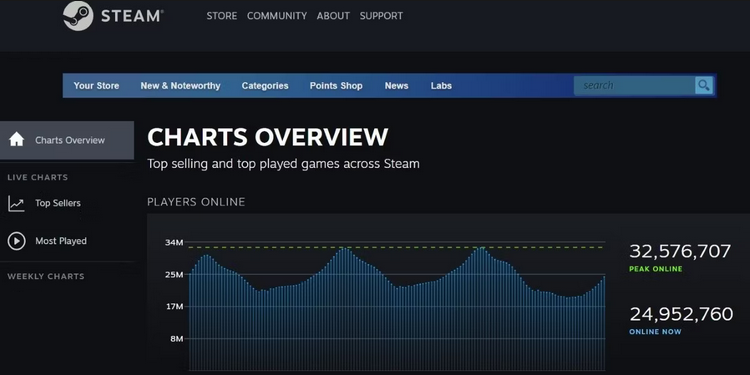
There isn’t much you can do if the servers are down but wait for the developers to resolve the problem.
Change Steam’s Internet Protocol
Real-time apps like Steam often employ the User Datagram Protocol (UDP) for communication to achieve low latency and quick data transfer. However, issues with the UDP protocol might occasionally cause the “Could not connect to the Steam network” message. You can test if changing Steam’s internet protocol to TCP (Transmission Control Protocol) helps.
- Select Properties by right-clicking the shortcut to the Steam desktop.
- Navigate to the Shortcuts tab.
- Add -tcp to the end of the file path in the Target box.
- Apply is followed by OK.
Allow Steam Through Windows Firewall
Another cause of the “Could not connect to the Steam network” issue is if your Windows Firewall prevents Steam’s connection. It would be best if you let Steam via your PC’s Windows Firewall prevent this.
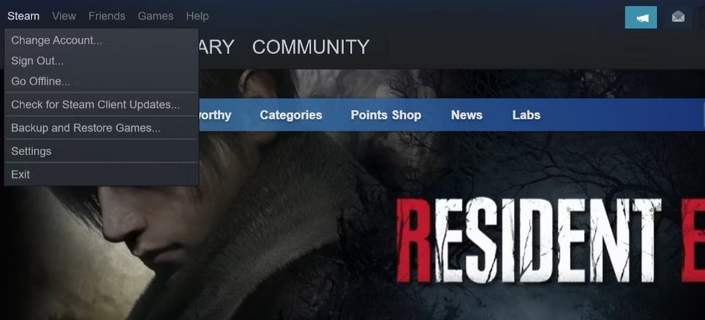
Update Steam
Well, using an older version of the Steam client can lead to various issues, including this one. As a result, it’s a good idea to ensure you’re running the latest version of Steam on Windows. To check for Steam updates, go to the top-left corner, click Steam, and then select Check for Steam Client Updates.
Allow Steam to find and install any available updates automatically.
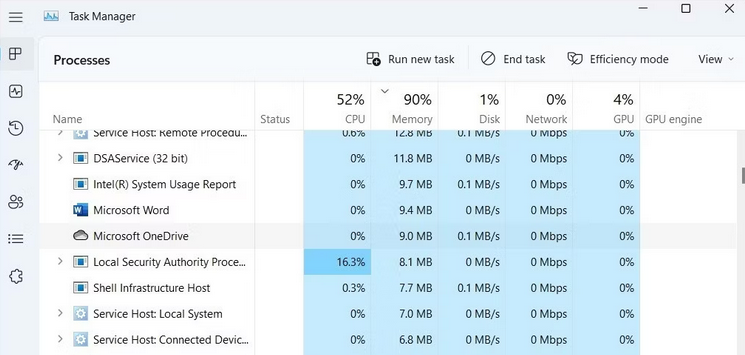
Disable Conflicting Background Apps
Background apps such as antivirus software, VPNs, download managers, and other programs might occasionally interact with Steam and cause unusual errors. Valve’s website outlines some of the most prevalent apps that potentially conflict with Steam. If you have similar programs installed, try closing them one at a time to see if Steam will work. To accomplish this, open Task Manager by pressing Ctrl + Shift + Esc. Select the program that may conflict with Steam in the Processes tab, then click the End Task button.
Update Network Drivers
Outdated network adapter drivers might create difficulties by preventing apps like Steam from connecting to the internet. If this is the case, upgrading your PC’s network adapter driver should get things going again. Follow the instructions to update the network adapter driver before attempting to use Steam again.
Reset TCP/IP & Flush DNS Cache
A malfunctioning TCP/IP stack or a damaged DNS cache are two possible causes of the “Could not connect to the Steam network” issue. Here’s what you can do to make them better.
- To launch the Power User menu, press Win + X and select Terminal (Admin) from the list.
- When the User Account Control (UAC) prompt displays, choose Yes.
- Enter the following commands in the console after each one.
netsh winsock reset
netsh int ip reset
ipconfig /release
ipconfig /flushdns
ipconfig /renew
After running the commands mentioned above, restart your computer. This will hopefully resolve the problem.
Reinstall Steam
If upgrading Steam does not resolve the issue, you may remove and reinstall the Steam client on your computer. Download and reinstall the Steam app after it has been deleted. After that, you should not encounter any errors when using Steam.
Conclusion:
Errors such as “Could not connect to the Steam network” should not prevent you from enjoying your favorite games or engaging with other gamers. To resolve connection errors in Steam, use the solutions listed above. However, as a last option, you may try clearing the Steam DNS cache.