With Windows 11/10, users connect PCs remotely via the Remote Desktop Desktop Connection (RDP) app. Unfortunately, some users have complained that they cannot connect to target PCs due to error 0x104 remotely. “We couldn’t connect to the remote PC. Error code 0x104.” an error notice informs users. This error implies the Remote Desktop client can’t find the remote PC. As a result, users cannot access the PCs they require remotely. Here is how you may resolve error code 0x104 on Windows 11/10.
How To Fix Easily Remote Desktop Error Code 0x104 In Windows 11/10?
Ensure Remote Desktop Is Enabled
Ensure the Remote Desktop feature is enabled on both the PC you’re attempting to connect to and the PC you’re currently using. For example, on Windows 11/10, you may enable Remote Desktop as follows.
1 – Press Windows + S to start Windows Search.
2 – Enter “remote desktop settings” into the search box.
3 – Click the Remote Desktop Settings search result to bring up those options.
4 – Select the Remote Desktop option.
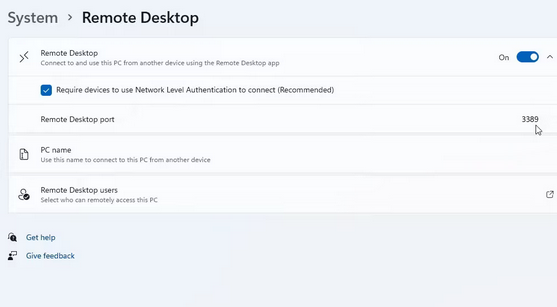
5 – In the window under Remote Desktop Settings, click Confirm.
Run Network Adapter Troubleshooter
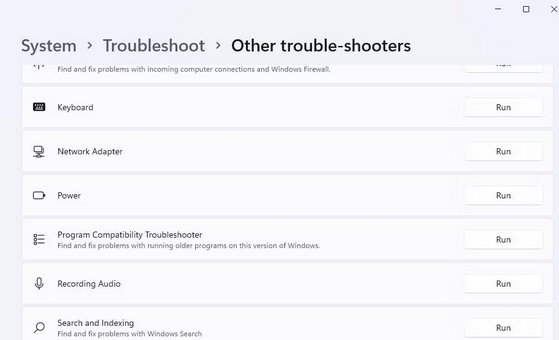
While error 0x104 is a networking-related issue, the Network Adapter troubleshooter might assist some users in addressing it. The troubleshooter can address network adapter issues generating error 0x104. Here are the steps for applying that troubleshooting.
1 – Open Windows Run by right-clicking Start and selecting Run.
2 – Enter ms-settings: troubleshoot and click OK.
3 – Choose the Other or Additional troubleshooters option, depending on whether you’re running Windows 11 or 10.
4 – Click Network Adapter’s Run option.
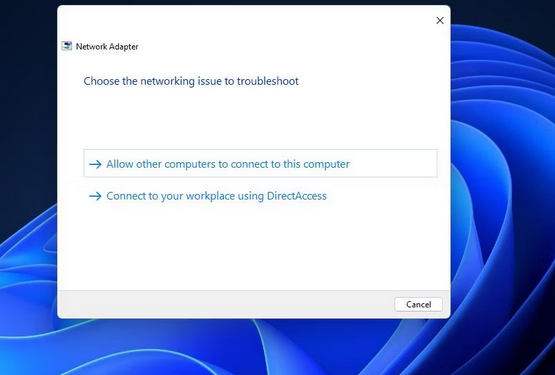
5 – Select the network adapter you use for your remote desktop connection in the troubleshooter. Instead, if you’re unsure, click All network adapters.
6 – To begin troubleshooting, press Next.
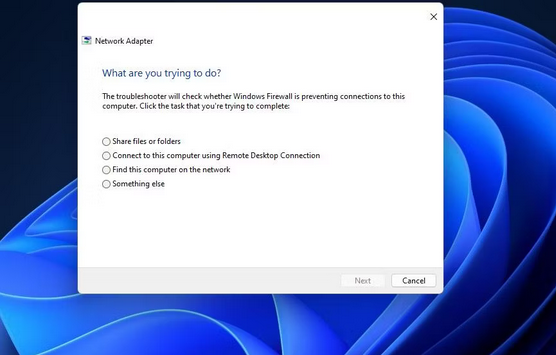
7 – Select the option. I’m having a different problem.
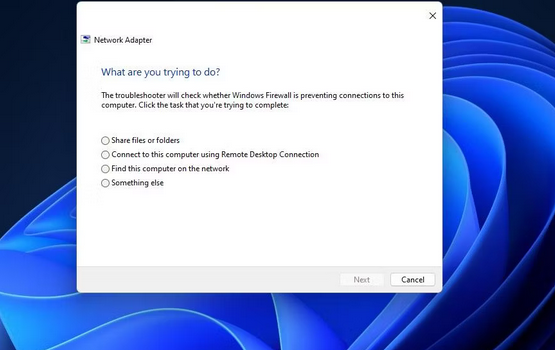
8 – Click the radio button that says Allow other computers to connect to this computer.
9 – To continue, select Connect this computer using the Remote Desktop Connection option and click Next.
Enable Network Discovery In Windows
Net Network Discovery is a feature that allows your PC to view and be seen by other networked devices. For remote desktop connections to work properly, it’s another feature that must be enabled. This is how Network Discovery may be enabled in Windows 11/10.
1 – To launch Run, press the Windows keyboard button + R.
2 – Input Control Panel in Run and choose OK.
3 – Click the Network and Internet categories.

4 – To access that app, choose Network and Sharing Center.
5 – To open the sharing options, click Change advanced sharing settings.
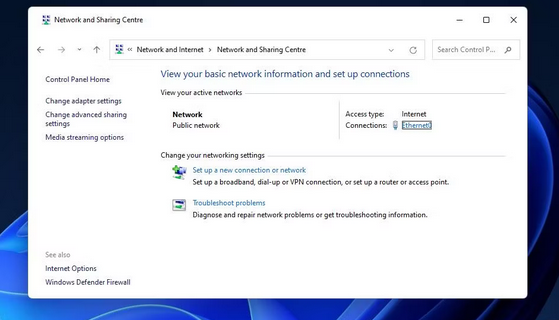
6 – Select the Turn on network discovery radio button for your network profile.

7 – To select that option, click the Turn on automatic setup of network connected devices checkbox.
8 – Press the Save changes button.
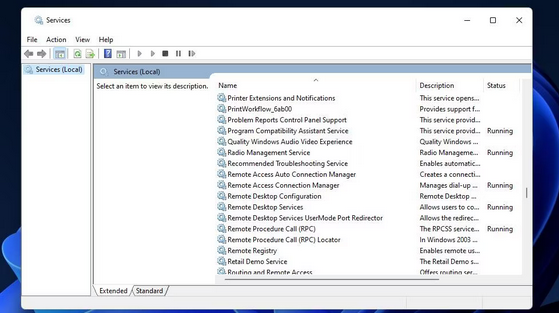
Start Remote Desktop Services
The 0x104 error might occur when some services required for RDP connections aren’t enabled and running. For example, users can connect to remote PCs using Remote Desktop Services. But first, verify that it is enabled and running as shown.
1 – Open Windows Search.
2 – Enter Services in the Type here to search box.
3 – Choose Services.
4 – Double-click Remote Desktop Services to open the service’s options.
5 – In the Startup drop-down selection for that service, click Automatic.
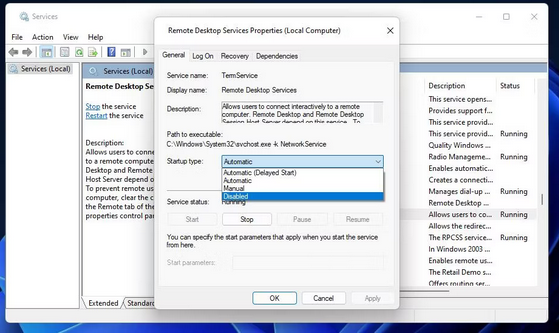
6 – For Remote Desktop Services, press the Start button.
7 – Click Apply to save the service settings you’ve set.
8 – Then quit the Remote Desktop Services Properties window by clicking OK.
9 – For the Remote Access Auto Connection Manager service, repeat steps four through eight.
Choose Remote Desktop Developer Settings
To connect remotely, Windows may need you to have developer rights. Here’s how to activate them.
1 – Launch the Windows Settings app.
2 – Click Privacy & Security in Windows 11’s Settings app. Users of Windows 10 must select Update & Security.
3 – Choose For developers to access those settings.
4 – Check the boxes next to the Remote Desktop developer settings.
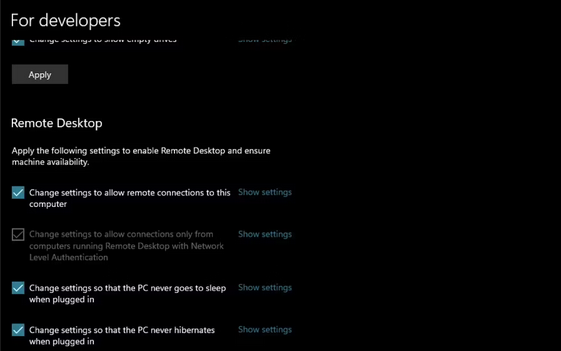
5 – To save the updated developer options, click Apply.
Unblock 3389 Port
Remote Desktop provides a default 3389 port for connections. Therefore, error 0x104 might be triggered by the Windows firewall blocking port 3389. If Windows Defender Firewall is blocking the 3389 port, follow these instructions to unblock it.
1 – Verify that Remote Desktop is enabled as described in Resolution One.
2 – Use the taskbar shortcut to launch the search tool in Windows.
3 – Enter Windows Defender Firewall with Advanced Security in the search text box.
4 – To open the Windows Defender Firewall with the Advanced Security feature, click on it.
5 – On the left side of the firewall utility’s display, click Inbound Rules.
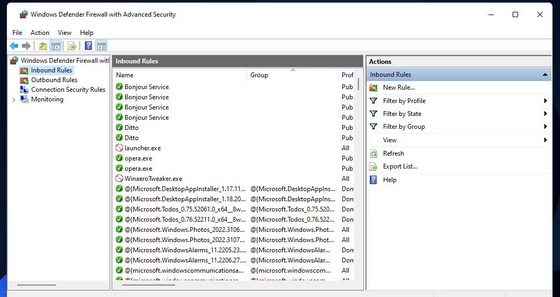
6 – Scroll down the list of incoming rules to discover Remote Desktop – User Mode (TCP-In) with a 3389 local port number.
7 – Right-click Remote Desktop – User Mode (TCP-In) and select the Enable Rule.
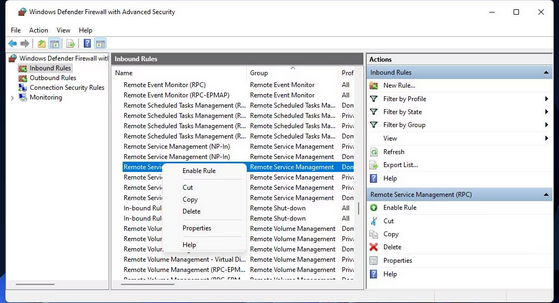
8 – Repeat the previous two steps for the Remote Desktop – User Mode (UDP-In) and Remote Assistance (RA Server TCP-In) rules by choosing their Enable options.
9 – Exit Windows Defender Firewall with Advanced Security and try to connect to your remote PC once more.
Set Automatic DNS Server
Have you set up a custom DNS server on your PC? If so, try using the automatic DNS server option instead. These are the steps for selecting the Get DNS server automatically option.
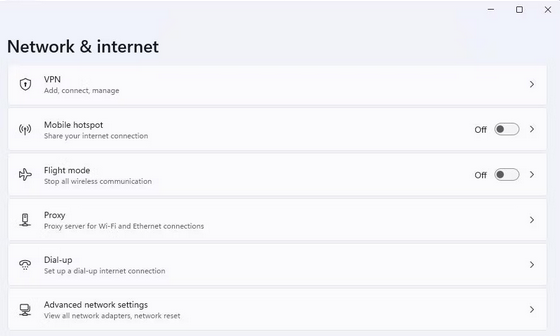
1 – Select the Settings shortcut by right-clicking the symbol for the Start button.
2 – Click network & internet to display the navigation options for that tab.
3 – To bring up more navigation options, choose Advanced network settings.
4 – Click the More network adapter options box to examine connections in the Control Panel.
5 – Right-click your PC’s internet network adapter and select the Properties option.
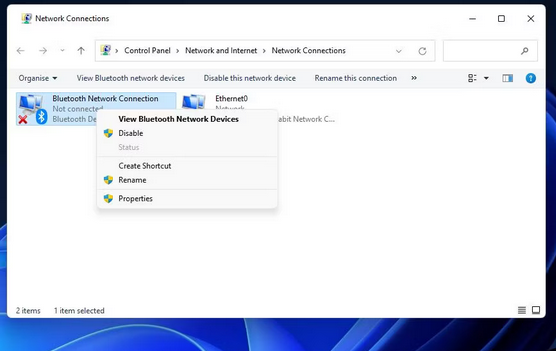
6 – Choose Internet Protocol Version 4 and press the Properties button.
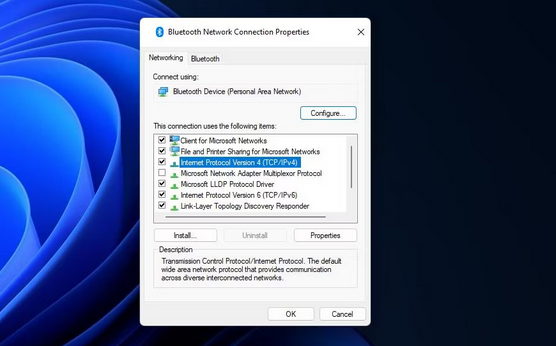
7 – Select the Get DNS server address automatically radio button if a custom DNS is set.
8 – Click the OK button on the IPV 4 properties window to close it.
Conclusion:
Those probable error code 0x104 solutions will likely resolve the issue and allow you to connect to your remote computer again. But note that using the RDC app, you don’t have to employ Microsoft’s Remote Desktop Protocol. Instead, if the error 0x104 remedies in this post don’t work for you, try another third-party app, such as Team Viewer or AnyDesk.