
When some users attempt to delete folders in Windows 11/10, they get Error 0x80070091, a File Explorer issue. The error message says, “The directory is not empty,” You can’t delete the directory that causes the error. However, you should be able to delete directories that contain directories without any issues.
How To Fix Quickly Directory Is Not Empty Error 0x80070091 In Windows 10 & 11?
Try Erasing Folder With Command Prompt
Using Command Prompt may be more of a workaround, but you’ll get the deleted folder if it works. Run Command Prompt with elevated (administrative) rights.
rmdir /s "folder path"As seen in this example, you’ll need to replace the folder path in that command with the location of whichever directory you wish to delete, including a driver’s letter and a full path for the directory.
rmdir /s "C:\Users\New folder"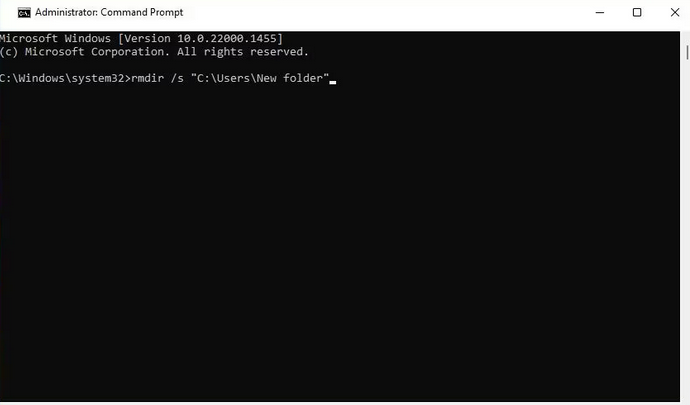
Restart Windows File Explorer
Restarting File Explorer can address issues with that file manager; however, shutting and reopening the Explorer window does not restart the file manager; you must restart the Explorer process using Task Manager, as shown below.
1 – Press Ctrl + Shift + Esc simultaneously to open Task Manager.
2 – Click the Processes tab and select File Explorer.
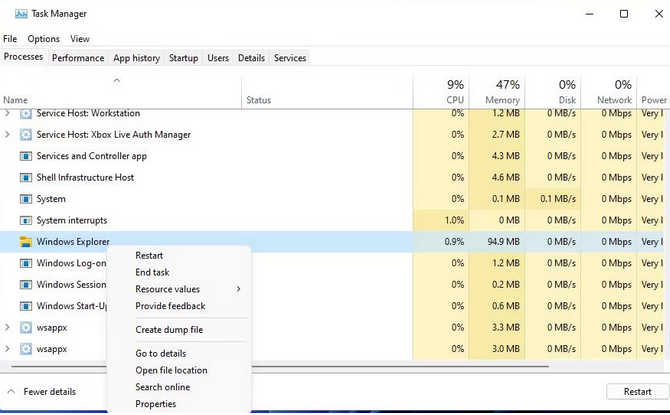
3 – Click the Restart button next to the Explorer process you want to restart.
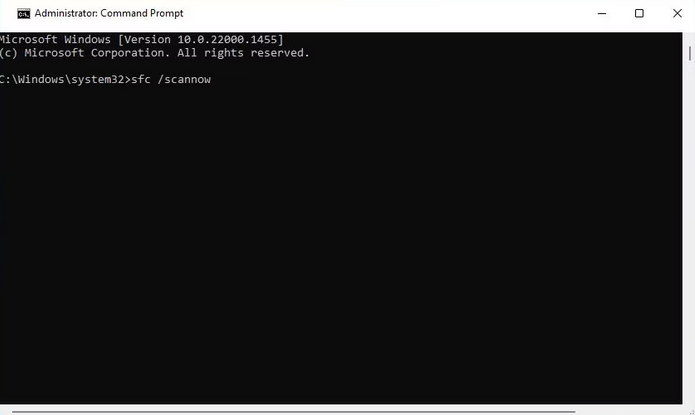
Scan System Files With SFC Scan
Performing an SFC scan may find and restore corrupted system error files and fix errors 0x80070091.
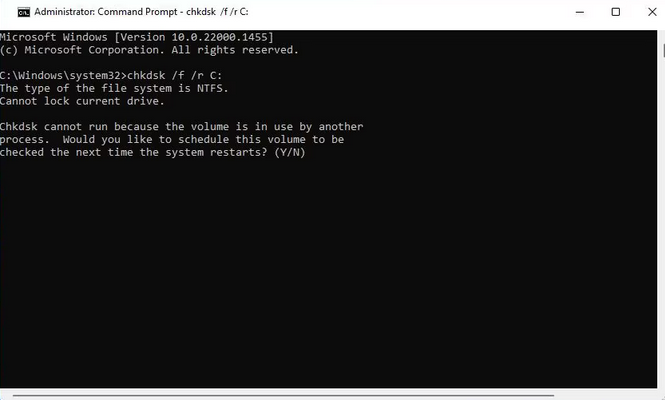
Check For Errors With Disk Scan
Here, you may check for and fix damaged sectors using Check Disk. However, several users say corrupted or defective hard drive sectors frequently cause the Check Disk error.
1 – Launch the Command Prompt window while logged in as an administrator.
2 – Enter the Check Disk command and then press Enter.
chkdsk /f /r C:3 – To schedule the scan for a restart, press Y.
4 – To restart, click Start and then select Power > Restart.
If the folder that the 0x80070091 error occurs for is not on the C: drive, alter the above command by replacing C: with the letter of the storage drive that contains the affected folder.
Modify Affected Folder’s Permissions
To address error 0x80070091, you may need to set an affected folder to full permission. To do so, adjust the permission settings of the folder as follows. Error 0x80070091 might arise due to inadequate folder permission.
1 – Launch Explorer and right-click the affected folder to choose Properties.
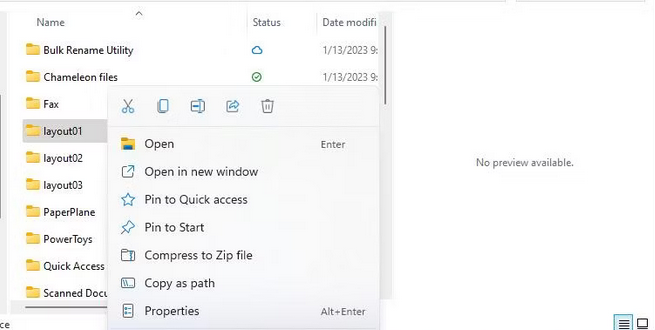
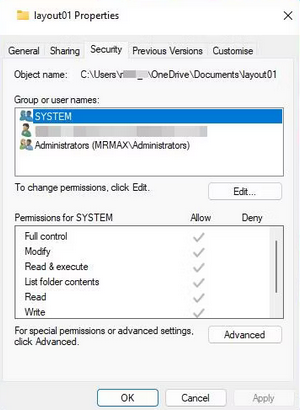
2 – Go to the Security tab of the window.
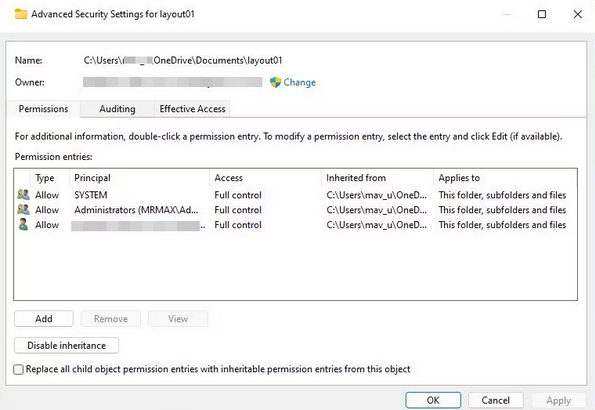
3 – Next, click the Advanced button.
4 – Click Change next to the owner’s name.
5 – Type your Windows user account name into the object name text box.
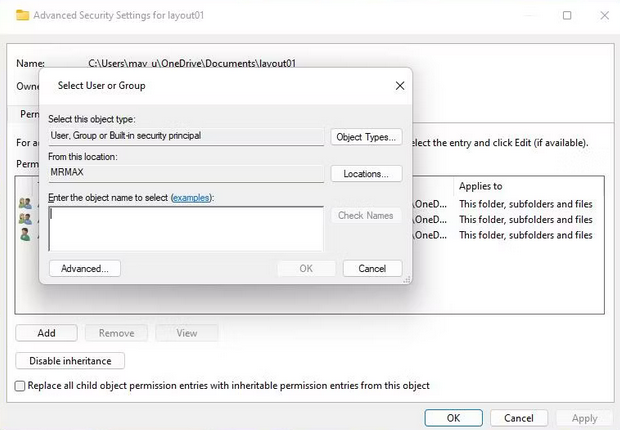
6 – Choose the Check Names option and then click OK.
7 – Select that setting by clicking Replace owner on subcontainers and objects.
8 – Press the Apply and OK buttons in the Advanced Security Settings box.
Run Antivirus Scan
If you’re still attempting to fix the error 0x80070091 on your PC after exhausting all the possible fixes listed above, run an antivirus scan with Windows Security or an alternative third-party app. Here is how to run a scan with the Windows Security app.
1 – Double-click a Windows Security (shield) icon on the taskbar’s system tray.
2 – Select Virus & threat protection > Scan options to view all scanning options.

3 – Choose the Full Scan option, which may take over an hour to complete.
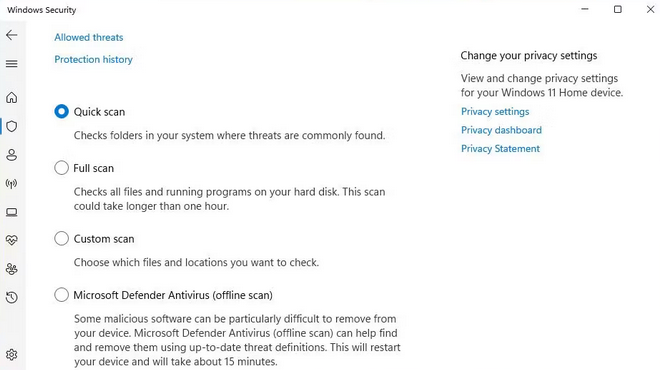
4 – Click Scan Now to begin antivirus scanning.
5 – After that, wait for the scan to identify anything; if it does, select Remove.
6 – To start the app, click Start actions.
Conclusion:
After applying those potential solutions, you should be able to delete the folders for which error 0x80070091 occurred; however, if that error persists, the Windows registry on your PC may be corrupted; to resolve such registry issues, you may need to perform a system restore or even reset Windows 11/10.