Windows updates often include new features, performance enhancements, and bug fixes. Unfortunately, certain machines run into issues after installing a significant update. For example, the display driver crashing problem is a regular issue following a Windows update. In addition, your display driver may crash owing to an old driver, compatibility issues with the latest update, and TDR conflict. Here are some things you may attempt to troubleshoot and fix a crashing display driver after an update.
How To Fix Easily Display Driver Crashing After A Windows Update?
Remove And Clean Install Display Driver
The display driver itself is frequently the source of display driver problems. Uninstalling the display driver and then reinstalling it from the manufacturer’s website is a simple fix for the issue. There are several ways to clean and install the display driver on a Windows computer. First, we will use the Display Driver Uninstaller to remove the driver and install it from the manufacturer’s website for this procedure. Next, download the DDU app on a USB drive and link it to your PC if you can’t boot into Windows due to severe crashing. After that, boot into safe mode on Windows and follow the steps below. Take note of a couple of additional things before you begin.
1 – We suggest you run DDU in safe mode to uninstall the drivers without any issues. When you try to use the app on regular boot, the uninstaller will detect and alert you that you are not in safe mode.
2 – You may also briefly lose access to your secondary display when the display driver uninstalls.
3 – To reinstall the driver, you may require an active Internet connection for verification and download. If not, ensure to download the offline version of the driver before continuing with the uninstallation step below.
The display driver should be installed correctly.
1 – Navigate to the DDU page and download the most recent uninstaller.
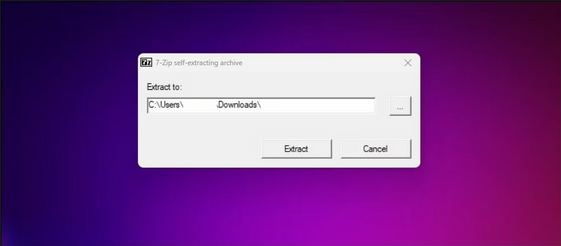
2 – Extract the .exe file to a new folder on your computer by running it.
3 – Click Display Driver Uninstaller.exe after opening the DDU folder. Click Yes when prompted by UAC.
4 – Click the Select device type drop-down on the DDU interface and choose GPU.
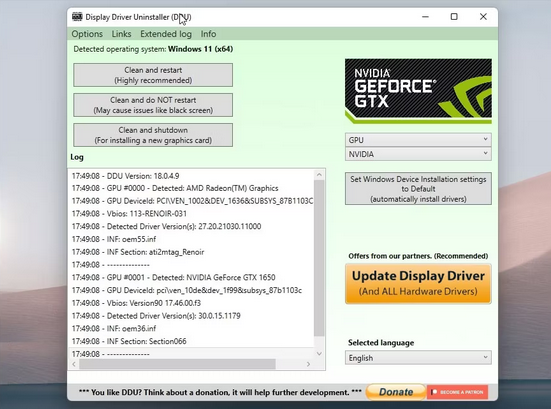
5 – Select your GPU from the Select device drop-down menu (Intel, AMD, Nvidia).
6 – Select Clean and restart the computer.
Before beginning to uninstall the display driver, DDU will create a restore point. If something goes wrong during the process, you may use it to restore your System to its previous condition.
1 – DDU will uninstall all drivers and components to make room for a clean installation. The computer will restart when the process is finished.
2 – Upon a restart, go to the manufacturer’s website for your display driver. AMD Radeon Software, Nvidia GeForce Experience, or Intel Graphics Windows.
3 – Get the most recent version of the display driver suite for your graphics processor.
4 – Run the installation and wait for the process to complete. Your secondary display should begin to function again after it has been installed.
5 – Restart your computer. The display driver ought presumably to stop creating issues after the restart.
Disable Multiplane Overlay Using Registry Editor
Disable Multiplane Overly (MPO) to fix the issue if your display driver crash also causes a black screen and stuttering. The Windows Display Driver Model’s MPO feature verifies multiplane overlay capabilities. Unfortunately, MPO is a prevalent contributor to AMD and Nvidia drivers crashing and other issues, such as the AMD driver time-out error. To fix the problem, disable the feature using Registry Editor.
Note: Improper alterations to the Windows Registry might cause system problems. Create a restore point as a backup option, and perform a registry backup. To disable the multiplane overlay.
1 – Click the Start button and type regedit.
2 – Click Registry Editor in the search results. If prompted by UAC, select Yes.
3 – In Registry Editor, go to the following location.
Computer\HKEY_LOCAL_MACHINE\SOFTWARE\Microsoft\Windows\Dwm4 – Right-click the Dwm key in the left pane.
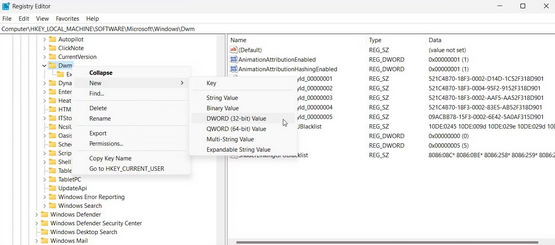
5 – Choose New > DWORD (32-bit) Value.
6 – Rename the key OverlayTestMode.
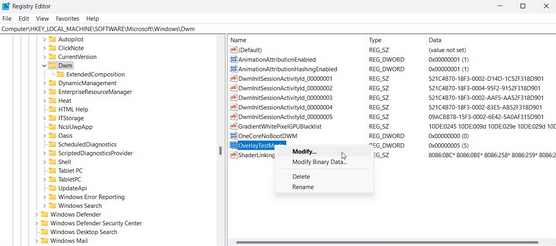
7 – To open the OverlayTestMode Value’s properties, double-click on it.
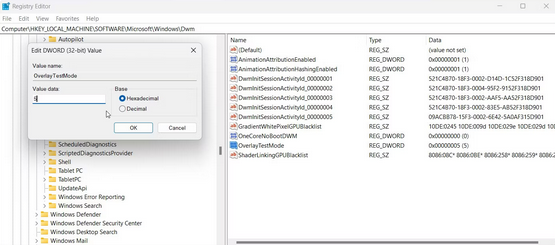
8 – Enter 5 in the Value data field and click OK to save the changes. It should disable MPO on your Windows Computer.
9 – Restart your computer after disabling the MPO to see if the display driver encounters any issues again.
Roll Back To The Previous Version Of Windows
Windows 10 and 11 both include a useful “go back” feature. To undo any modifications the new update made to your computer, you can roll back to a prior version of Windows. This feature is temporary, though. You only have ten days to perform a rollback. After ten days, Windows will destroy the old backup, rendering the “Go back” option inoperable. To perform a Windows update rollback, follow these steps.
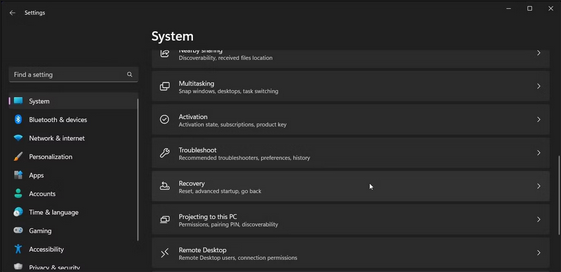
1 – Hit Win + I to open the Settings app.
2 – Scroll down and click Recovery on the System tab.
3 – Click the Go back button.
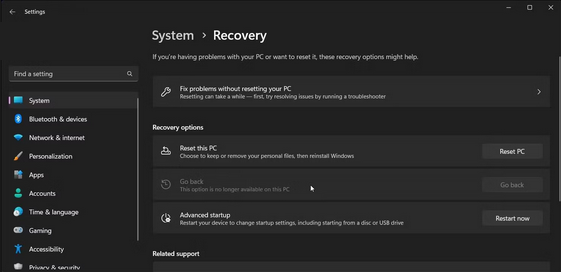
4 – Click Restore and follow the on-screen prompts.
If you get the “This option is no longer available on this PC” notification, you won’t be able to use this feature to perform a restore. But, for future updates, you may use a registry trick to extend the ten day rollback time to 60 days in Windows 11, giving you a longer rollback window.
Disable Fast Startup
Fast Startup allows your computer to boot up faster than usual. The feature can, however, infrequently disrupt regular startup behavior and create display driver issues. Disable Fast Startup on your computer to attempt to fix the issue. Here’s how to go about it.
1 – Open Run by pressing Win + R.
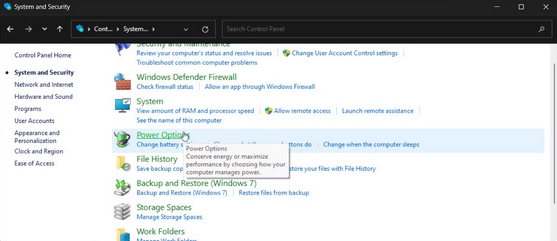
2 – Type control and click OK.
3 – Select System and Security > Power Settings in the Control Panel.
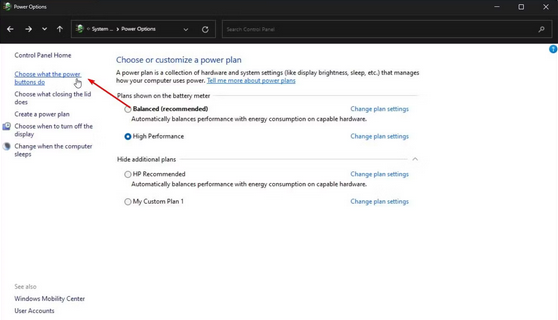
4 – On the left pane, click What the power button does.
5 – The Shutdown settings are greyed out by default. To activate them, click Change settings currently inaccessible to display the Startup option.
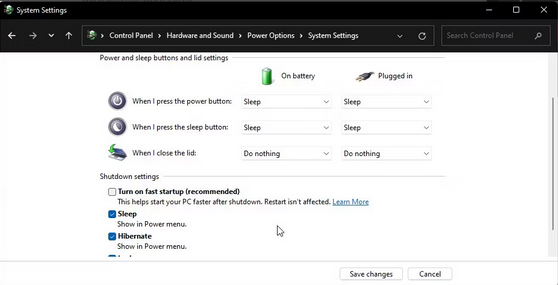
6 – To disable the feature, uncheck the Turn on Fast Startup (recommended) option.
7 – To implement the changes, click Save changes and restart your computer.
Conclusion: Display Driver Crashing
Problems with the display driver and incompatible Windows updates typically cause it to crash. But, in most situations, the answer is simple and does not need the expenditure of repair funds. But, if the issue remains, investigate the likelihood of a failing graphics processor. Worsening problems, unusual fan noise, frequent crashes, and a significant decline in performance are common warning indicators.