
Uninstall VirtualBox On Mac: It is common for most users to select Oracle VirtualBox when considering virtualization on a Mac. If you want to construct virtual machines that function seamlessly on your MacBook, iMac, or Mac mini, this free virtualization app is a fantastic place to start. But, as you progress, you may require sophisticated options such as VMWare or Parallels Desktop. It also eliminates the need for VirtualBox and VMs, which occupy storage space. Therefore it’s time to uninstall the app and delete the VM data from your Mac. Here’s a basic introduction to getting started.
Guide On How To Uninstall VirtualBox On Mac?
There are two ways to uninstall VirtualBox from your Mac: official and manual.
Uninstall VirtualBox Using VirtualBox Uninstaller Tool
That is the official way to uninstall Oracle VirtualBox and its associated files from your Mac. This method employs the VirtualBox Uninstaller Tool, included in the package originally used to install VirtualBox on your Mac.
1 – Double-click the DMG file containing the VirtualBox installer. You may redownload the DMG file from the VirtualBox Downloads page if you accidentally deleted it.
2 – To open the DMG file, double-click it.

3 – Double-click VirtualBox_Uninstaller.tool after your Mac has mounted the DMG file.
4 – You may be prompted to enter your Mac’s password before the Terminal window appears.
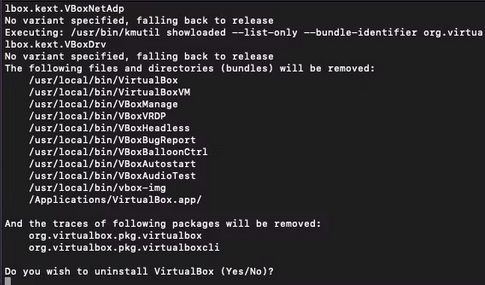
5 – As seen in the Terminal window, the Uninstaller software will delete the VirtualBox app and its associated files from numerous locations.
6 – In the Terminal box, type Yes and hit Enter.
7 – If prompted, give the administrator password.
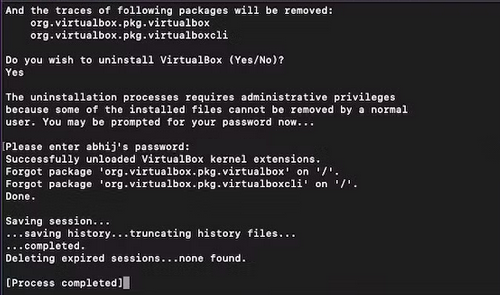
8 – The Uninstaller Tool will complete the removal procedure and display a “Process completed” notice in a few seconds.
That indicates that the tool successfully uninstalled VirtualBox from your Mac. Most significantly, you won’t have to worry about any leftover files. In most circumstances, this method works flawlessly; but you may try the manual method if it does not.
Uninstall VirtualBox On Mac Using Manual Method
You can try this method if the automatic Uninstaller Tool does not perform as intended. Nevertheless, as you may expect, this method takes longer to remove the library and leftover files. To uninstall the VirtualBox application from the Application Folder.
1 – Ensure that you have exited the VirtualBox app.
2 – Go to your Mac’s Applications folder and look for the VirtualBox app.
3 – Right-click the app and select Move to Bin from the context menu.
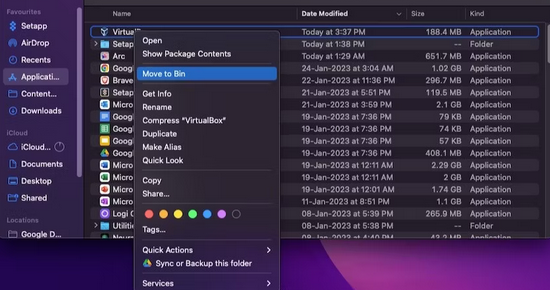
4 – Go to the Bin and remove the app.
To remove Library/Residual files.
1 – Launch Finder and go to Macintosh HD > Library.
2 – Locate and remove the following folders/files.
~/Library/VirtualBox
~/Library/Preferences/org.VirtualBox.app.VirtualBox.plist
~/Library/Saved Application State/org.VirtualBox.app.VirtualBox.SavedState
~/Library/LaunchAgents/org.virtualbox.vboxwebsrv.plist
~/Library/Saved Application State/org.VirtualBox.app.VirtualBox.SavedState
You may now delete these files from your Bin.
Yay! You have successfully deleted all VirtualBox-related files from your Mac. You may also use one of the Mac cleanup apps to automate this process. We recommend using a specific third-party app if you are concerned about working with system files. But, deleting the files/folders described above will not cause system-level problems.
Conclusion:
After removing all traces of VirtualBox from your Mac, you may experiment with different virtualization tools for Mac. Therefore, it is critical to choose which virtual machine software is most suited to your requirements. You should weigh the benefits and drawbacks of running a virtual computer on your Mac.

