Despite being one of the most excellent browsers on the market, Google Chrome still has several flaws that its users must deal with regularly. Rome is the browser of choice for most internet users. Some of them also choose to use Facebook rather than the app via the web. However, several users have recently complained that Facebook does not operate on Chrome. If you need help with this, stay reading to learn how to solve Facebook Not Working on Chrome.
If Facebook suddenly stops working in your browser, it might be aggravating. This is usually caused by third-party extensions or browser cache data interfering with Chrome resources. Other factors, though, can contribute to this problem. So we’ve prepared a list of troubleshooting options in this post that may help you Fix Facebook Not Working on Chrome.
Fix Facebook Not Working on Chrome Browser
Below is a list of workarounds for Facebook needing to be fixed on Chrome.
Restart Google Chrome
If Facebook does not open on Google Chrome after several attempts, restart your browser. It’s conceivable that Chrome couldn’t access some files in the current session, causing Chrome to act strangely. Restart Chrome to see whether the problem has been resolved.
Clear Chrome Cache Data and Browsing History
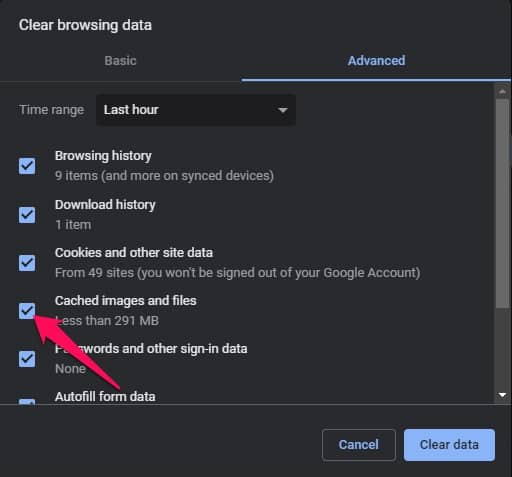
Facebook may not work on Chrome due to a corrupted cache and browsing data. Delete your browser’s cache and browsing data because it will not affect your browser. Here’s how to clear Google Chrome’s cache and browser data:
- Open Chrome and select the three dots in the upper right corner.
- Go to Security and Privacy > Settings.
- Clear browsing data is the option.
- Clear Data can be found under the Advanced tab.
Change DNS Settings
The DNS, or Domain System Name, is a list of records requested from the ISP. A single change in DNS settings could cause multiple failures in Chrome. So, where can you alter your DNS settings?
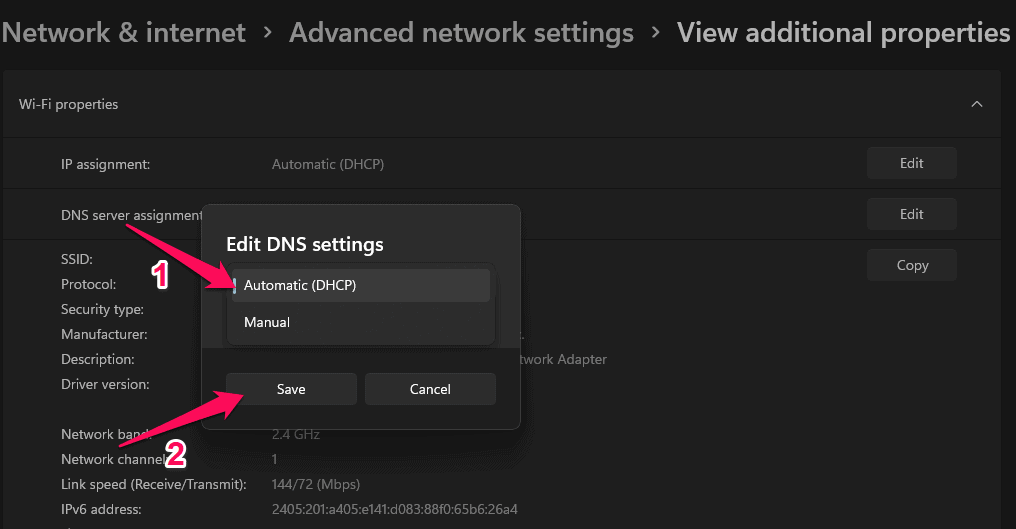
- To open Settings, press the Windows key + I.
- Click on Advanced Network Settings under the Network & Internet menu.
- Choose the network to which you are presently connected.
- Select View Additional Properties from the menu.
- Next to the DNS server assignment, click Edit.
- Click Save after changing the DNS to Automatic (DHCP).
- Restart the Chrome browser and see if Facebook now appears.
Disable or Uninstall Extensions
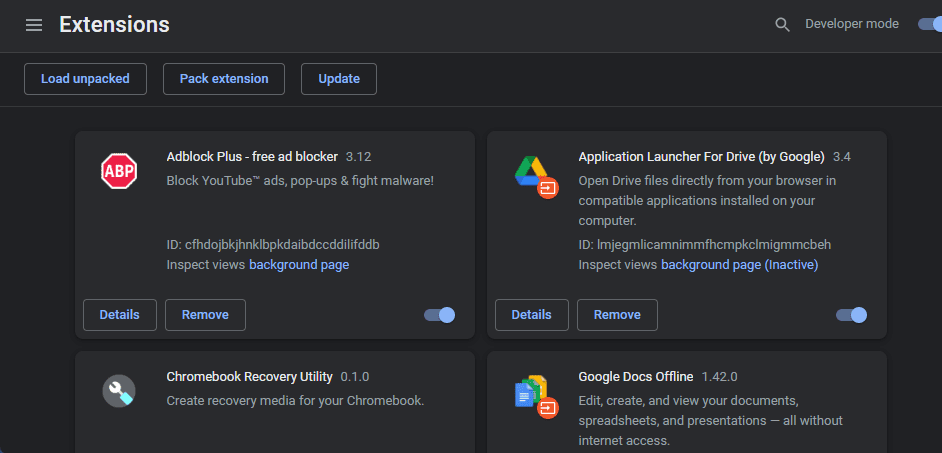
Chrome Extensions are designed to make our web browsing and chores more manageable. However, some extensions may occasionally cause Chrome to malfunction. To make sure an extension isn’t causing the problem, disable each extension one at a time until Facebook works again. Uninstall the extension if Facebook starts operating again after you disable it. Here’s how to go about it:
- In the Chrome browser, click the Extensions icon.
- Select Manage Extensions from the menu.
- To disable an extension, turn off the toggle next to it.
- Click the Remove option to remove an extension.
Sync System Date and Time
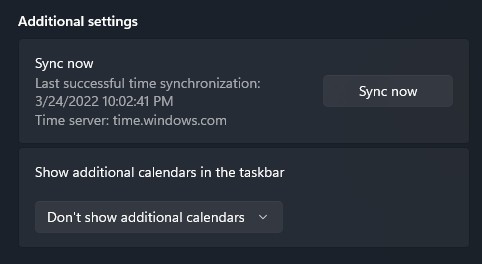
This Error Facebook Not Working on Chrome can occur if your system’s date and time are not synchronized. Here’s how to check and correct it:
- Open Settings by clicking on Start.
- Go to Time and Language.
- Scroll down to Additional Options and select Sync immediately.
Reset Chrome
If none of the above procedures worked, try resetting your browser to its default settings. Here’s how to go about it:
- Click the three vertical dots menu in the top right corner of Google Chrome.
- Select Settings.
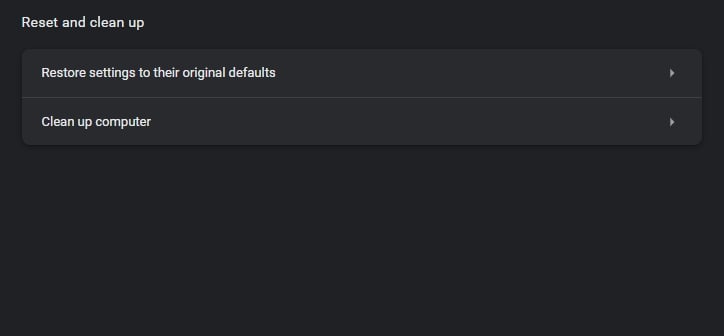
- Go to Advanced > Reset and clean up now.
- Follow the on-screen instructions after clicking Restore settings to their original defaults.
Finally Facebook Not Working on Chrome:
This article covered how to Solve Facebook Not Working on Chrome. We are hopeful that the preceding troubleshooting procedures will resolve this issue. If you have any questions, please leave a comment below.
